If you’re on the hunt for the best turkey chili recipes, you’re in for a treat! Turkey chili is not just a healthy option; it’s also packed with flavor and perfect for any occasion. From the classic version loaded with beans to unique twists like Mediterranean or smoky black bean chili, there’s a recipe for every palate. So, grab your apron, and let’s investigate these delicious options that’ll have your taste buds dancing!
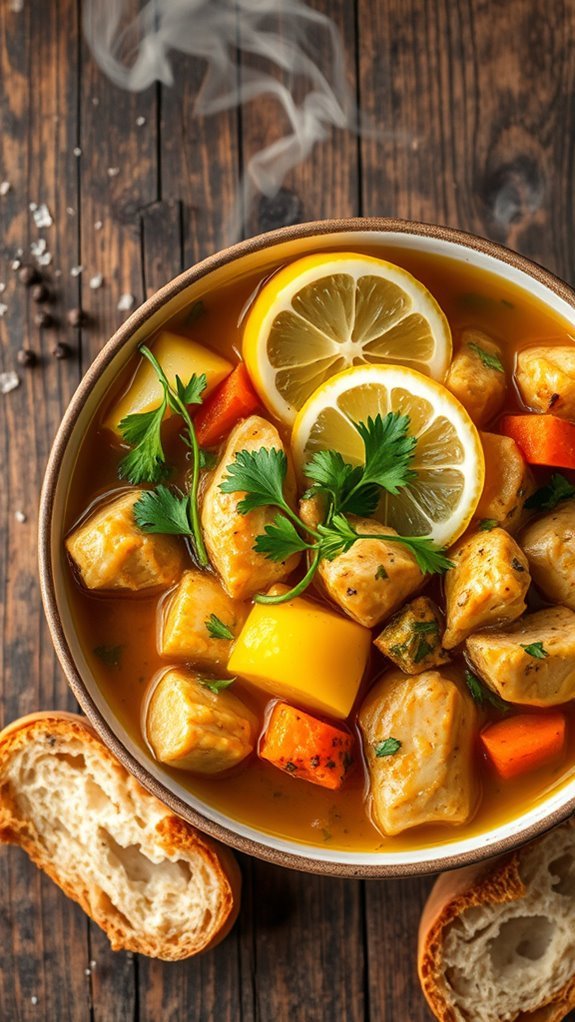
Classic Turkey Chili
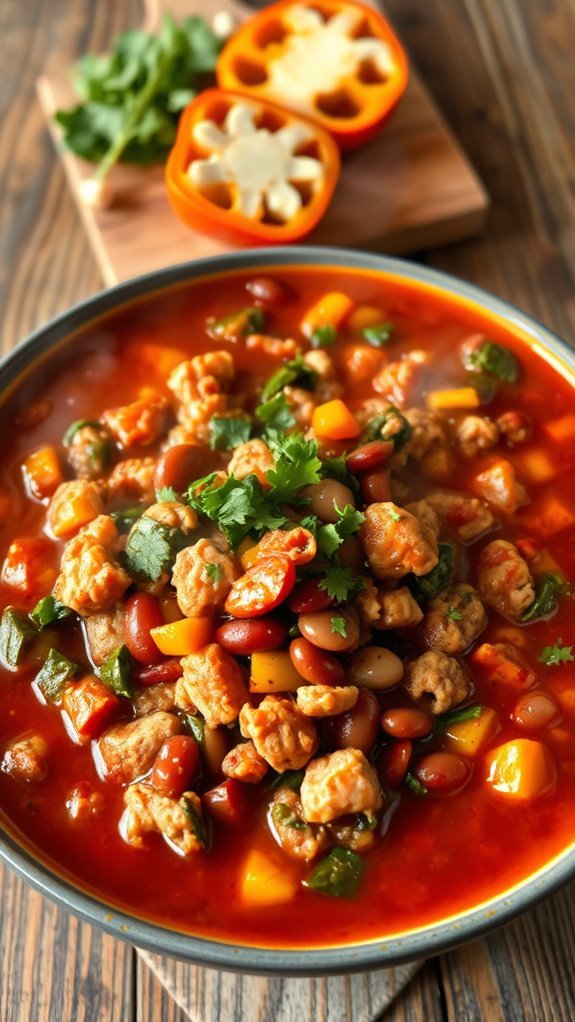
Classic Turkey Chili is a hearty and flavorful dish that brings together the warmth of spices with the lean richness of ground turkey. This comforting meal is perfect for chilly evenings and can be made in one pot for easy cleanup.
With a combination of beans, tomatoes, and spices, this chili isn’t only delicious but also packed with protein and nutrients, making it a great option for family dinners or meal prep for the week.
Ingredients:
- 1 pound ground turkey
- 1 medium onion, diced
- 2 cloves garlic, minced
- 1 bell pepper, diced (any color)
- 1 can (15 oz) kidney beans, drained and rinsed
- 1 can (15 oz) black beans, drained and rinsed
- 1 can (28 oz) diced tomatoes (with juice)
- 2 tablespoons chili powder
- 1 tablespoon cumin
- 1 teaspoon smoked paprika
- 1 teaspoon salt
- 1/2 teaspoon black pepper
- 1 cup chicken broth
- Olive oil for cooking
Cooking Instructions:
In a large pot, heat a drizzle of olive oil over medium heat. Add the diced onion, bell pepper, and minced garlic, sautéing until the vegetables are soft and the onion is translucent.
Add the ground turkey to the pot, breaking it up with a spoon and cooking until browned. Stir in the chili powder, cumin, smoked paprika, salt, and black pepper, allowing the spices to toast for a minute.
Next, add the kidney beans, black beans, diced tomatoes, and chicken broth. Bring the mixture to a boil, then reduce the heat to low and let simmer uncovered for about 30 minutes, stirring occasionally, until the chili thickens and the flavors meld.
Extra Tips:
For an extra depth of flavor, consider adding a tablespoon of cocoa powder or a splash of Worcestershire sauce during cooking.
If you prefer a spicier kick, throw in some diced jalapeños or a few dashes of hot sauce. This chili is versatile; feel free to add other vegetables like corn or zucchini.
Leftovers taste even better the next day, making this a great dish for meal prepping. Serve it with your favorite toppings such as shredded cheese, sour cream, or fresh cilantro for added flavor and texture.
Spicy Chipotle Turkey Chili
Spicy Chipotle Turkey Chili is a flavorful twist on traditional chili that packs a punch with smoky chipotle peppers and ground turkey. This dish is perfect for a cozy night in or for serving a crowd during game day. With its rich, spicy flavor and hearty texture, this chili is sure to become a favorite in your meal rotation. Plus, it’s easy to make and can be customized to suit your heat preference!
Ingredients:
- 1 pound ground turkey
- 1 medium onion, diced
- 3 cloves garlic, minced
- 1 can (14.5 ounces) diced tomatoes
- 1 can (15 ounces) kidney beans, drained and rinsed
- 1 can (15 ounces) black beans, drained and rinsed
- 2-3 chipotle peppers in adobo sauce, minced
- 1 tablespoon adobo sauce from chipotle can
- 2 teaspoons ground cumin
- 1 teaspoon chili powder
- 1 teaspoon smoked paprika
- Salt and pepper to taste
- 2 cups chicken broth
- 1 tablespoon olive oil
- Optional toppings: shredded cheese, sour cream, chopped cilantro, avocado
To make the Spicy Chipotle Turkey Chili, start by heating the olive oil in a large pot over medium heat. Add the diced onion and cook for about 5 minutes until softened. Stir in the minced garlic and ground turkey, cooking until the turkey is browned.
Next, add the diced tomatoes, kidney beans, black beans, chipotle peppers, adobo sauce, cumin, chili powder, smoked paprika, salt, and pepper. Pour in the chicken broth and bring the mixture to a simmer. Reduce the heat to low and let it cook for 30-40 minutes, stirring occasionally, until the chili thickens and the flavors meld together.
For the best results, consider letting your chili simmer longer to intensify the flavors even more, or prepare it a day in advance and let it sit in the refrigerator overnight. When reheating, you may want to add a bit more broth if it has thickened too much.
Feel free to adjust the number of chipotle peppers based on your spice tolerance, and don’t hesitate to add in your favorite vegetables, like bell peppers or corn, for added texture and nutrition. Enjoy your Spicy Chipotle Turkey Chili with your choice of toppings for a truly delicious meal!
White Bean Turkey Chili
White Bean Turkey Chili is a delicious and hearty dish that combines the lean protein of turkey with the creamy texture of white beans and a blend of spices. This chili is perfect for a cozy night in or for feeding a crowd.
It’s easy to prepare and can be customized with your favorite toppings, making it a versatile option for any meal. Whether you serve it with fresh bread, over rice, or topped with cheese and avocado, this chili is sure to warm you up from the inside out.
Ingredients:
- 1 lb ground turkey
- 1 can (15 oz) white beans, drained and rinsed
- 1 can (14.5 oz) diced tomatoes, undrained
- 1 cup chicken broth
- 1 medium onion, diced
- 2 cloves garlic, minced
- 1 green bell pepper, chopped
- 1 tbsp olive oil
- 1 tsp ground cumin
- 1 tsp chili powder
- ½ tsp smoked paprika
- Salt and pepper to taste
- Fresh cilantro for garnish (optional)
- Sour cream or Greek yogurt for topping (optional)
To make the White Bean Turkey Chili, start by heating the olive oil in a large pot over medium heat. Add the diced onion, green bell pepper, and minced garlic, sautéing until the vegetables are softened, about 5 minutes.
Next, add the ground turkey to the pot, breaking it apart with a spoon, and cook until browned. Stir in the cumin, chili powder, smoked paprika, salt, and pepper, allowing the spices to toast for a minute.
Then, pour in the diced tomatoes, chicken broth, and white beans. Bring the mixture to a boil, then reduce the heat and let it simmer uncovered for about 20-25 minutes, stirring occasionally.
When making White Bean Turkey Chili, feel free to adjust the spice level to your taste by adding more chili powder or some diced jalapeños for heat. You can also make this dish ahead of time; it often tastes even better the next day as the flavors meld together.
For a thicker chili, you can mash some of the white beans before adding them to the pot. Don’t forget to garnish with fresh cilantro and a dollop of sour cream or Greek yogurt for added creaminess and flavor!
Turkey and Sweet Potato Chili

Turkey and Sweet Potato Chili is a hearty and nutritious dish that brings together the lean protein of ground turkey with the natural sweetness of sweet potatoes. This combination not only makes for a delicious meal but also packs in vitamins and minerals, making it a perfect option for a cozy dinner or meal prep for the week.
With a blend of spices and vegetables, this chili is sure to warm you up and satisfy your hunger.
Ingredients:
- 1 pound ground turkey
- 1 large sweet potato, peeled and diced
- 1 can (15 oz) black beans, rinsed and drained
- 1 can (15 oz) diced tomatoes with green chilies
- 1 medium onion, chopped
- 2 cloves garlic, minced
- 1 bell pepper, chopped
- 2 cups chicken broth
- 2 teaspoons chili powder
- 1 teaspoon cumin
- 1 teaspoon smoked paprika
- Salt and pepper to taste
- Olive oil for cooking
- Optional toppings: avocado, cilantro, sour cream, shredded cheese
To prepare the Turkey and Sweet Potato Chili, heat a large pot or Dutch oven over medium heat and add a drizzle of olive oil.
Once hot, add the chopped onion, garlic, and bell pepper, sautéing until softened. Next, add the ground turkey, breaking it apart with a spoon, and cook until browned.
Stir in the diced sweet potatoes, black beans, diced tomatoes, chicken broth, and all the spices. Bring the mixture to a boil, then reduce the heat to a simmer, covering the pot.
Allow the chili to cook for about 25-30 minutes, or until the sweet potatoes are tender and the flavors meld together, stirring occasionally.
When cooking Turkey and Sweet Potato Chili, remember that the longer it simmers, the more intense the flavors will become.
Feel free to adjust the spice levels by adding more chili powder or even some diced jalapeños if you prefer a kick.
This chili can be made ahead of time and freezes well, making it an excellent option for meal prep.
For an added layer of flavor, consider garnishing with fresh avocado, cilantro, or a dollop of sour cream before serving.
Enjoy your healthy and delicious chili!
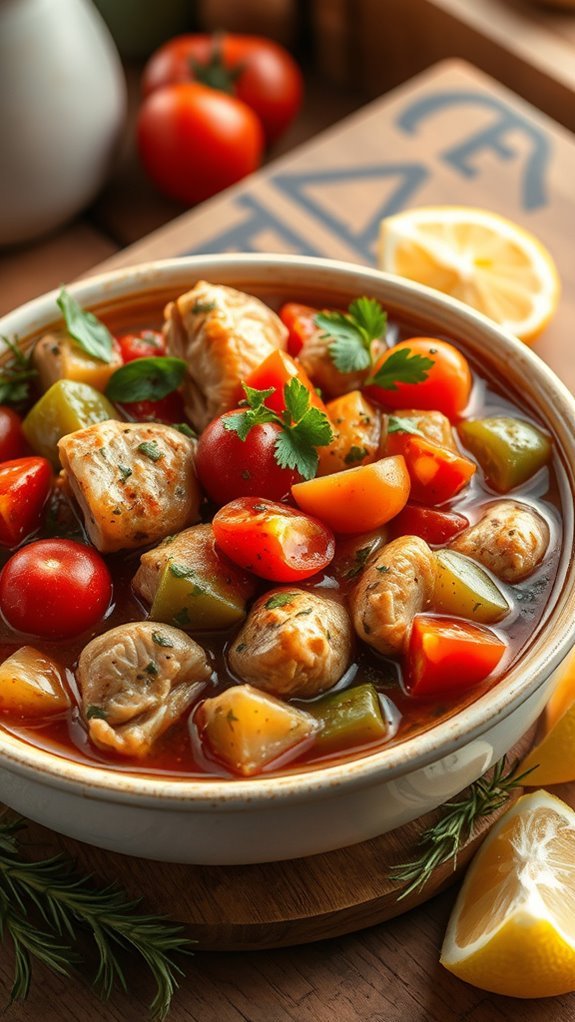
Smoky Turkey Chili With Black Beans
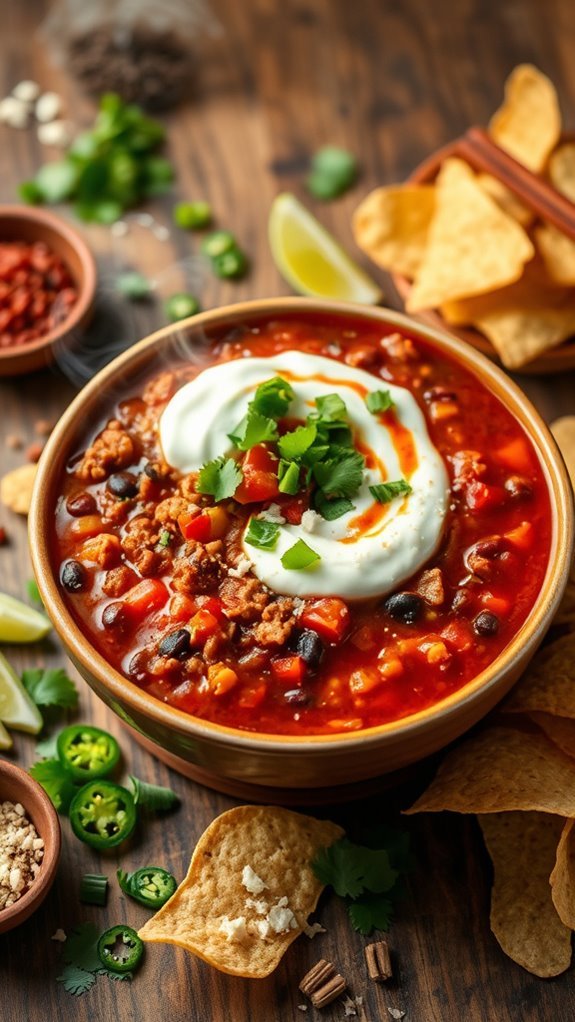
Smoky Turkey Chili with Black Beans is a hearty and flavorful dish that combines the richness of ground turkey with the deep, smoky notes of spices and the creaminess of black beans. This chili is perfect for a cozy night in or a gathering with friends and family.
It’s not only delicious but also packed with protein and fiber, making it a satisfying meal that warms you from the inside out. Let’s plunge into this recipe that brings a touch of smokiness to your chili game!
Ingredients:
- 1 lb ground turkey
- 1 can (15 oz) black beans, drained and rinsed
- 1 can (14.5 oz) diced tomatoes with green chilies
- 1 small onion, diced
- 2 cloves garlic, minced
- 1 bell pepper, diced (any color)
- 2 tbsp chili powder
- 1 tsp smoked paprika
- 1 tsp cumin
- 1/2 tsp salt
- 1/4 tsp black pepper
- 1 cup chicken broth
- 2 tbsp olive oil
- Fresh cilantro, chopped (for garnish)
- Avocado slices (for serving, optional)
Cooking Instructions:
In a large pot or Dutch oven, heat the olive oil over medium heat. Add the diced onion and bell pepper, and sauté until softened, about 5 minutes.
Stir in the minced garlic and cook for another minute. Add the ground turkey to the pot, breaking it up with a spoon as it cooks until browned.
Once the turkey is cooked, stir in the chili powder, smoked paprika, cumin, salt, and black pepper, mixing well to coat the meat and vegetables.
Pour in the diced tomatoes, black beans, and chicken broth, stirring to combine. Bring the mixture to a boil, then reduce the heat to low and let it simmer for 20-30 minutes, allowing the flavors to meld together.
Extra Tips:
For an even richer flavor, consider adding a dash of liquid smoke or a few tablespoons of chipotle in adobo sauce to amplify the smokiness of the chili.
If you prefer a thicker chili, let it simmer uncovered for the last 10 minutes of cooking. Feel free to customize the heat level by adding fresh jalapeños or cayenne pepper if you enjoy a spicier kick.
Leftovers can be stored in the refrigerator for up to three days and often taste even better the next day as the flavors continue to develop!
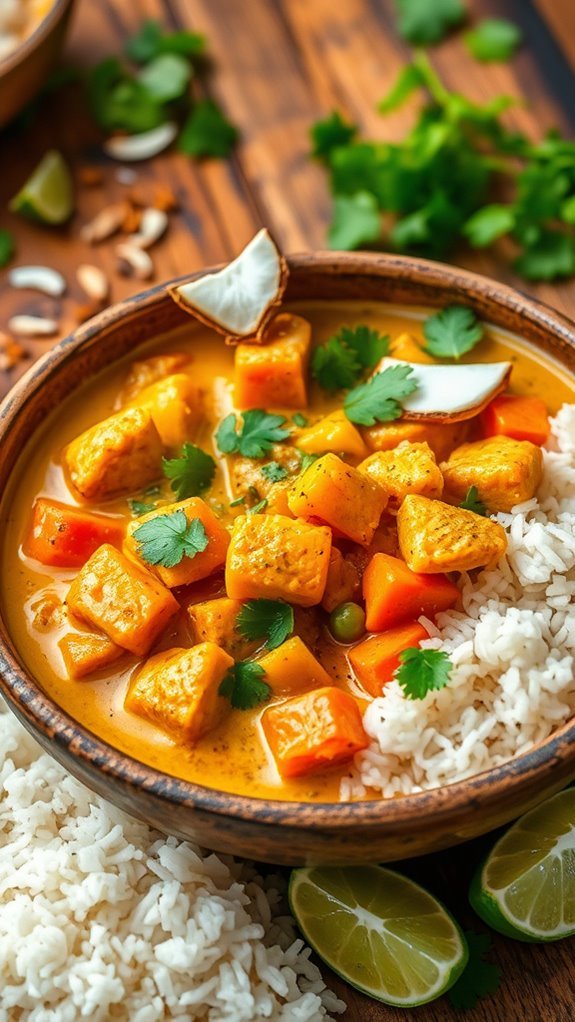
Turkey Chili With Quinoa

Turkey Chili with Quinoa is a hearty and nutritious dish that combines lean ground turkey with protein-rich quinoa and a medley of vegetables and spices. This one-pot meal is perfect for a cozy night in or for meal prep throughout the week. Not only does it offer a delightful balance of flavors, but it’s also a great way to incorporate healthier ingredients into your diet while satisfying your chili cravings.
Ingredients:
- 1 lb ground turkey
- 1 cup quinoa, rinsed and drained
- 1 can (15 oz) black beans, drained and rinsed
- 1 can (15 oz) kidney beans, drained and rinsed
- 1 can (28 oz) diced tomatoes with juices
- 1 medium onion, chopped
- 2 cloves garlic, minced
- 1 bell pepper, chopped (any color)
- 2 cups chicken or vegetable broth
- 2 tablespoons chili powder
- 1 teaspoon cumin
- 1 teaspoon paprika
- Salt and pepper to taste
- Olive oil for cooking
- Optional toppings: avocado, cilantro, shredded cheese, sour cream
To make the Turkey Chili with Quinoa, start by heating a large pot over medium heat and adding a drizzle of olive oil. Once the oil is hot, add the chopped onion, bell pepper, and minced garlic, sautéing until the vegetables are soft (about 5 minutes).
Next, add the ground turkey to the pot, breaking it up with a spoon, and cooking until browned. Stir in the chili powder, cumin, and paprika, cooking for another minute until fragrant.
Then, add the quinoa, black beans, kidney beans, diced tomatoes (with juices), and broth. Bring the mixture to a boil, then reduce the heat and let it simmer for about 20-25 minutes, or until the quinoa is cooked and the chili has thickened. Season with salt and pepper to taste.
When cooking this Turkey Chili with Quinoa, feel free to customize it to your liking by adding other vegetables such as corn or zucchini, or adjusting the spice level by adding jalapeños or cayenne pepper.
If you prefer a thicker chili, let it simmer longer to reduce the liquid. Leftovers taste even better the next day, so consider making a double batch for meal prep! Serve with your favorite toppings to elevate the flavor and presentation.
Mediterranean Turkey Chili

Mediterranean Turkey Chili is a delightful twist on the classic chili, infusing it with flavors and ingredients from the Mediterranean region. This hearty dish combines lean ground turkey with vibrant vegetables, aromatic spices, and a touch of Greek influence, making it a healthier and flavorful option for chili lovers. Perfect for a cozy dinner or meal prep, this recipe will warm your soul and satisfy your taste buds.
Ingredients:
- 1 lb ground turkey
- 1 medium onion, diced
- 2 cloves garlic, minced
- 1 red bell pepper, diced
- 1 zucchini, diced
- 1 can (14 oz) diced tomatoes, undrained
- 1 can (15 oz) chickpeas, drained and rinsed
- 1 cup low-sodium chicken broth
- 2 tsp ground cumin
- 1 tsp smoked paprika
- 1 tsp dried oregano
- ½ tsp red pepper flakes (optional)
- Salt and pepper to taste
- 2 tbsp olive oil
- Fresh parsley, chopped (for garnish)
- Feta cheese, crumbled (for serving)
In a large pot or Dutch oven, heat the olive oil over medium heat. Add the diced onion and garlic, sautéing until the onion becomes translucent.
Next, add the ground turkey, breaking it apart with a spoon, and cook until browned. Stir in the red bell pepper and zucchini, cooking for another 3-4 minutes.
Add the diced tomatoes, chickpeas, chicken broth, cumin, smoked paprika, oregano, red pepper flakes, salt, and pepper. Bring the mixture to a simmer, then reduce the heat to low, cover, and let it cook for 20-25 minutes, stirring occasionally to allow the flavors to meld.
For an extra layer of flavor, consider adding a splash of lemon juice just before serving to brighten up the dish.
You can also customize your Mediterranean Turkey Chili by incorporating other vegetables like eggplant or spinach, or by adding olives for a salty kick.
Serve the chili hot, garnished with fresh parsley and a sprinkle of feta cheese for a lovely finish. Remember, this dish is even better the next day, so feel free to make it ahead of time and enjoy the leftovers!
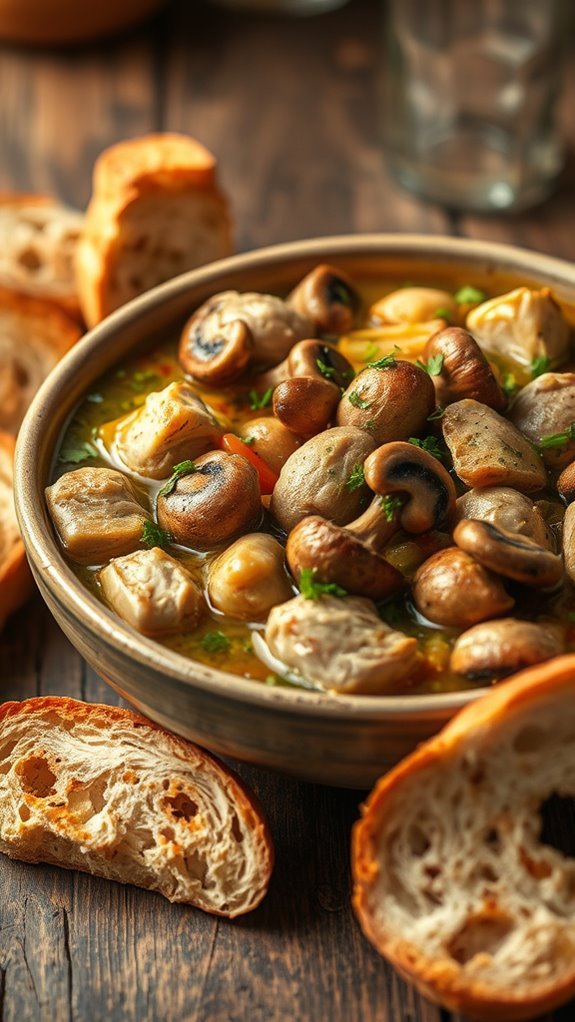
Slow Cooker Turkey Chili

Slow Cooker Turkey Chili is a hearty and flavorful dish that’s perfect for a cozy night in or meal prepping for the week. Combining lean ground turkey with a variety of beans, vegetables, and spices, this dish isn’t only delicious but also a healthier alternative to traditional chili.
The slow cooking process allows the flavors to meld together beautifully, resulting in a rich and satisfying meal that you can enjoy with minimal effort.
Ingredients:
- 1 pound ground turkey
- 1 can (15 oz) black beans, rinsed and drained
- 1 can (15 oz) kidney beans, rinsed and drained
- 1 can (15 oz) diced tomatoes with green chilies
- 1 cup chopped onion
- 1 cup chopped bell pepper (any color)
- 2 cloves garlic, minced
- 2 tablespoons chili powder
- 1 teaspoon ground cumin
- 1 teaspoon paprika
- ½ teaspoon salt
- ½ teaspoon black pepper
- 1 cup chicken broth
Cooking Instructions:
In a skillet over medium heat, brown the ground turkey until it’s no longer pink, breaking it up into small pieces as it cooks.
Drain any excess fat, then transfer the turkey to the slow cooker. Add the black beans, kidney beans, diced tomatoes, onion, bell pepper, garlic, chili powder, cumin, paprika, salt, black pepper, and chicken broth to the slow cooker.
Stir well to combine all ingredients. Cover and cook on low for 6-8 hours or on high for 3-4 hours, until the vegetables are tender and the flavors have melded together.
Extra Tips:
For an extra kick, consider adding some diced jalapeños or a dash of hot sauce to the mixture.
You can also customize the chili by adding other vegetables like corn or zucchini, or even swap out the ground turkey for chicken or beef if desired.
Serve your turkey chili with toppings like shredded cheese, sour cream, or chopped cilantro for added flavor.
Leftovers can be stored in the fridge for up to five days or frozen for later use, making this dish a great option for meal prep!
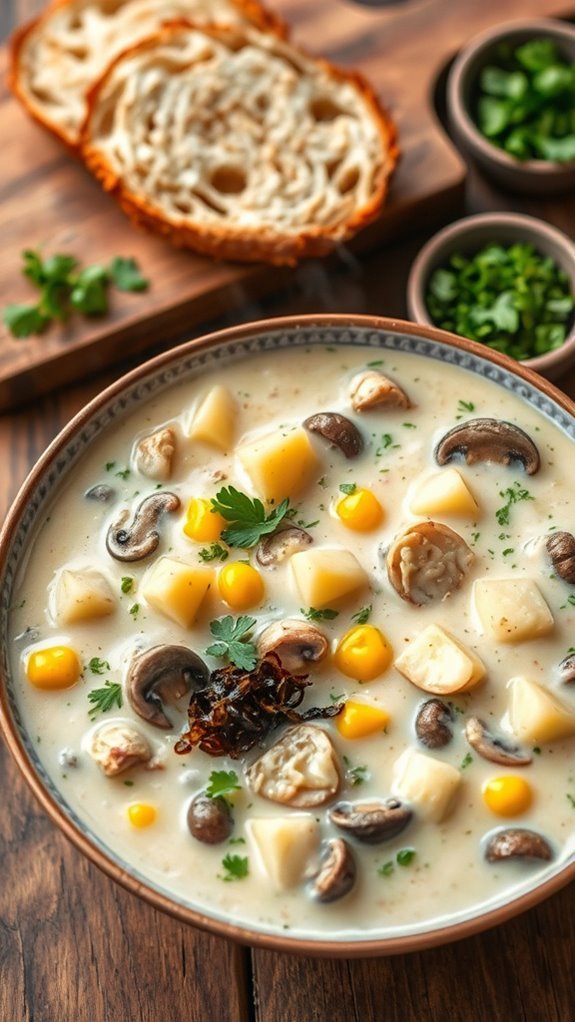
Turkey Chili With Corn and Peppers

Turkey chili with corn and peppers is a delicious and hearty dish that’s perfect for a cozy dinner or game day gathering. Packed with lean ground turkey, sweet corn, and colorful bell peppers, this chili isn’t only flavorful but also a healthier alternative to traditional beef chili. The combination of spices and fresh ingredients creates a satisfying meal that can easily be customized to suit your taste preferences.
Ingredients:
- 1 lb ground turkey
- 1 can (15 oz) kidney beans, drained and rinsed
- 1 can (15 oz) black beans, drained and rinsed
- 1 can (15 oz) corn, drained
- 1 medium onion, diced
- 2 bell peppers (any color), diced
- 3 cloves garlic, minced
- 1 can (28 oz) crushed tomatoes
- 2 cups chicken broth
- 1 tbsp chili powder
- 1 tsp cumin
- 1 tsp paprika
- Salt and pepper to taste
- Olive oil for cooking
Instructions:
In a large pot or Dutch oven, heat a drizzle of olive oil over medium heat. Add the diced onion and bell peppers, cooking until they soften, about 5-7 minutes.
Stir in the minced garlic and ground turkey, cooking until the turkey is browned and fully cooked, breaking it up with a spoon as it cooks.
Once the turkey is browned, add the crushed tomatoes, chicken broth, kidney beans, black beans, corn, chili powder, cumin, paprika, salt, and pepper.
Bring the mixture to a boil, then reduce the heat to low and simmer for at least 30 minutes, stirring occasionally, to allow the flavors to meld together.
Extra Tips:
For a spicier kick, consider adding diced jalapeños or a splash of hot sauce to the chili.
You can also experiment with different beans or add in other vegetables like zucchini or carrots for added nutrition.
If you have time, letting the chili sit for a few hours or overnight in the refrigerator can improve the flavors even more.
Serve your turkey chili with toppings like shredded cheese, sour cream, or fresh cilantro for a delightful finishing touch!
One-Pot Turkey Chili With Kale

This One-Pot Turkey Chili with Kale is a hearty and nutritious dish that combines lean ground turkey with the vibrant flavors of bell peppers, tomatoes, and kale.
Perfect for a cozy weeknight dinner, this recipe isn’t only simple to prepare but also packed with protein and fiber. The kale adds a delightful texture and a boost of vitamins, making this chili a satisfying meal that everyone will love.
Ingredients:
- 1 lb ground turkey
- 1 tablespoon olive oil
- 1 onion, diced
- 2 cloves garlic, minced
- 1 bell pepper, diced (any color)
- 1 can (14.5 oz) diced tomatoes, undrained
- 1 can (15 oz) kidney beans, rinsed and drained
- 2 cups vegetable or chicken broth
- 2 cups fresh kale, chopped
- 2 tablespoons chili powder
- 1 teaspoon cumin
- Salt and pepper to taste
Instructions:
In a large pot, heat the olive oil over medium heat. Add the diced onion and garlic, sautéing until the onion is translucent.
Next, add the ground turkey and cook until browned, breaking it up with a spoon. Stir in the diced bell pepper, chili powder, and cumin, cooking for an additional 2-3 minutes.
Pour in the diced tomatoes and broth, followed by the kidney beans and chopped kale. Bring the mixture to a simmer, reduce the heat, and let it cook for about 20 minutes, allowing the flavors to meld.
Season with salt and pepper to taste before serving.
Extra Tips:
For an extra kick, consider adding a diced jalapeño or a splash of hot sauce.
You can also customize this chili by incorporating other vegetables like zucchini or corn. If you’re looking for a thicker consistency, let it simmer uncovered for a bit longer.
This dish also stores well, so feel free to make a larger batch and enjoy leftovers throughout the week!